Sunday 12 November 2017

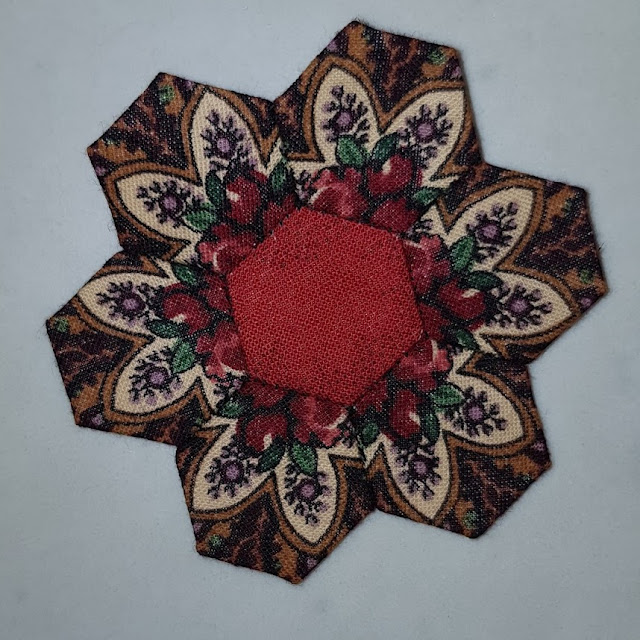
I just love doing these hexagon rosettes

My aim is just one per day with five of the background hexagons added around one side so the bulk of the adding the background is done.


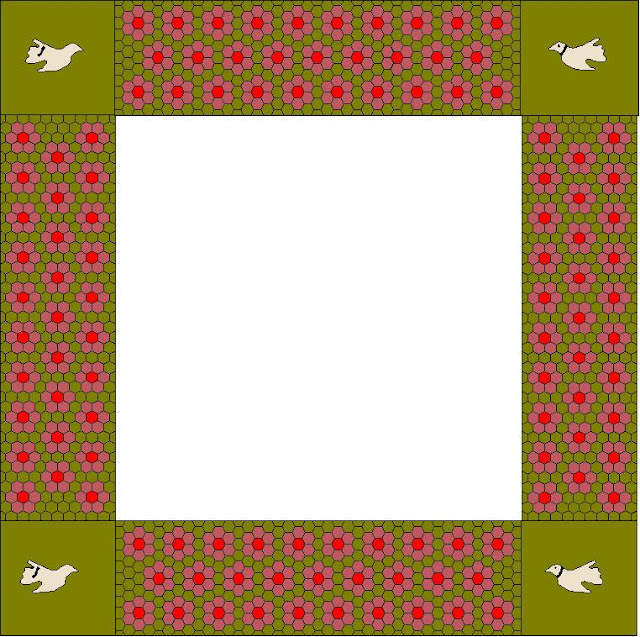
I plan to lay them out as a border something like this below.
I think I have done enough for about two sides so far. I don't want to count them as I just want to enjoy the process.

I stitch away from myself with the furthest hexagon just slightly raised above the one in front of me. I find this makes it easier just to catch a couple of threads.

At the beginning and end of each seam, I wind the thread round the needle twice to strengthen the weakest point. It also means if the thread should fail at some point in the future, it will only be one seam which needs fixing.
 When I hit a dead end and need to get back to where I started, I travel the thread under the seam allowance winding the thread around the needle twice at the beginning and end of each seam as above.
  And I have found my Fiskars hexagon punch will happily cope with a double thickness of my 165gr paper. This means I can cut out about 150 hexagons in a matter of a few minutes.
Every time the phone or doorbell rings, everything has to be put out of Ruperts reach. This weeks damage.....
And the leg of the footstool. 
Thank heavens it was the cheapie kitchen footstool. He'll be two in March, it should have ceased by now........

Wednesday 18 October 2017

Hexagons, English Paper piecing Tips


This is the back of the fabric with four different positions for these hexagons. I have another two to stitch.


Sometimes either because the print is very pale or just because the printing doesn't show well on the back, then you can use a light box or just tape your fabric to a window to see where to stick the papers in place. 

I cut our roughly round the papers. For plain or tone on tones I just cut squares, 1½ inches for a half inch hexagon.  I will trim them down later. The little clips hold each set together.

I cut them back after I have stitched them together but before I remove the papers.
 Half trimmed.
Fully trimmed. I find this easier than trying to cut to an exact size and it gives you more to play with when stitching the papers in place. I am not saying this is the right or wrong way to do it, just what suits me.

This was the very first one I sewed  and I loved it, however so did one little dog....
 I found it in his mouth. All but two of the papers had gone.......

I might be able to use it with some judicious use of starch...... I had been thinking he was getting better on the chewing front...... after all he's over 18 months old now.

I have decided to go against the tradition of using a pale tan background used in early hexagon quilts and to go with an olive green, also from Petra Prinns. 
There's a Facebook group for people making these hexagon quilts. People are making their hexagons in different sizes right down to ¼ inch! You can find the group by clicking on the name Libby Morgan Mosaic Quilt Sew Along. Or search the hashtag #libbymorganmosaicquilt on Instagram.

English Paper piecing and hexagons.


All of these above are from Dutch Heritage fabrics by Petra Prinns and Nel Kooiman. Each one has half inch sides and is one inch from point to furthest point.

I will try and put the following ones with their 'friends' from the same fabric.


I start by using a smear of glue from a glue stick to hold the paper in place on the back of the fabric. I try to line up the design with hopefully at least two points on the print. And for some reason, Blogger isn't letting me show you how today.....

I'll try in in another post.......  I don't even want to begin telling you the problems I have had getting these off my new phone....... Technology is wonderful when it works..... I thought Blogger was a google product so I am surprised how difficult it has been. I also tried from my iPad, heaven help me....... grrrrrrr lols

Thursday 14 September 2017

Huge change to our little house.

From when we bought the house 15 years ago we planned to change the windows. We thought we'd do it soon after moving in 5 years ago but we got quotes either for silly money or for reasonable money but with companies who insisted we didn't need planning consent. After the kitchen was done, and both the bathrooms, I couldn't delay it any longer. Although double glazed, the patio doors let in a draft and the wood was in definite need of resealing. This time I got quotes from east of the house rather than the west. One was for silly money, one was for half way between the cheapest and the highest and they would get planning consent.  The windows were ugly and it turned out not what planning consent had been in the first place........ This is the before shot.

Are the after photo.  I feel these windows are far more in keeping with the style of house.
Sash windows are my new love.

Round the back of the house, the mahogany sliding patio doors have been replaced with French doors.


It all looks so much better from the inside as well. 

Today it feels wonderful not to have any workmen here.  They were all fine, but it exhausts me. 

Hence the only bit of stitching done was hand appliqueing the centre to a background fabric. Some stitching is better than none :-)

On my next post I hope to have started my Jane Austen quilt...... hope, not promise.

Friday 1 September 2017

Jane Austen and Karen Styles.

I have finally got my Jane Austen quilt planned out. I am pleased with it but not pleased my intention not to make quilts over 65 inches square has gone out the window.......

And I played with changing the look completely. I have named this version  'Jane goes to Bali' 

Karen Styles came to the UK for the Festival of Quilts and whilst she was here did a Workshop at Cowslip and at Sue Watters house. As Sue lives 30 miles away I wanted to go. A lovely couple of days of soothing hand work, except I hadn't allowed for the roadworks outside Gloucester on the way home. It took nearly 2 hours to do those 30 miles...... It used up a lot of my precious spoons. (Google spoon theory if you think I am talking gobbledegook) 
This is my centre of the Okehampton quilt. I shall use it, but in a quilt of my own. I don't have a good track record of finishing quilts designed by others.  I love how the fussy cutting of the outside border worked. 
This is the glorious fabric. I don't know if there is still some out there.

------------

And now some very sad news. George was killed on the road last weekend. My beautiful boy, my quilting buddy, my morning wake up call has gone. 


He died exactly eight years to the day from when we got him as a kitten. We have done much soul searching about whether we were/ are right to let them out. We think we are. He has chased rabbits, butterflies, shrews and squirrels. He has been drenched by the rain, waded in deep snow, had the odd cat fight, got stuck up a tree and many many adventures he would not have had as an indoor cat. Our feelings are, better eight years of adventures than sixteen of none. My heart aches again for my four legged friend. George was mine by his choice, Rosie loves my husband more. For those of you new to my blog, Rosie and George are British Shorthair cats.  George's pedigree name was Porteous Bounty Hunter.

Saturday 19 August 2017

Starting Jane Austen coverlet/quilt

Do you remember some time ago, I rescued a pair of 1980s curtains made of Warner fabric in the same design as the centre of the Jane Austen coverlet? The time has come to start it.
I have measured the angle of the diamonds on the original, it seems to vary between 70° and 75°. To fit the smaller diamonds around it, whatever size I use, needs to be divisible by 11.

I cut out diamonds in multiples of 1¼", 1 1/8" and 1".  And with both, I cut it at 70°and 75°. I tried to align the flowers and the birds the same as the original. In the original the base of the basket is not quite on the horizontal.... I wasn't aware of being OCD but this annoys me. I know they did it to accommodate both the birds at the top but it is like a painting hanging askew.

It seems the colour varies according to the camera.....

Lis kindly gave permission for me to use her image from the Bowes museum where you can see the complete panel.  Click on her name to see her other photos.

You can see my fabric, back at the top, has a different treatment framing the basket of flowers.

This is based on 1¼" x 11 and 75°
 The same but twisted a little.

 1" X 11 at 70°

1" X 11 at 75°

 1 1/8" x 11 at 70°

1 1/8" x 11 at 75°

I am going with the 70° with a 1 1/8th base.

Then came designing the layout. It seems the Austen sisters (if it were them who made it) Joined the sashing in many different ways.


I quite fancied doing it like this until I realised how many partial seams would be involved.


I am fairly sure this will be the way I shall piece mine. You can see how those little diamonds at the bottom and the sides have to be a third the edge and vertical length of the bigger diamonds and why the bigger central square has to be divisible by eleven to fit the sashing which also has to fit the tiny diamonds at the edges.

Had you realised that the larger and tiny diamonds are mirrors imaged both side to side and top to bottom? I think I will go the extra mile to mirror image in the centre section, but the outer border, probably not.